Monday, January 16, 2012

Oatmeal Nutties

Photobucket


The recipe card may call them "Oatmeal Nutties" but really they are just a tweaked version of ANZAC biscuits.  Funnily enough underneath the oatmeal nutties recipe there is a recipe for ANZAC biscuits.

These cookies are incredibly easy to make, it is a one bowl & one pot recipe.  There is no need to cream any butter or to carefully fold in flour.  There is no need to chill the dough in the fridge or to roll it out to 1/4 inch thick.  All things I loathe to do, especially when the fridge is already so full, it is impossible to be cramming in two baking trays with carefully shaped cookies.  Or worse into the freezer where the trays will be at creative angles. 

Photobucket

Oatmeal Nutties (Adapted from Australian Women's Weekly)

Ingredients
1 cup rolled oats
1 cup dessicated coconut
3/4 cup plain flour
3/4 cup caster sugar
1/2 teaspoon salt
125g butter
2 tablespoons water
2 teaspoons golden syrup or treacle syrup
1/2 teaspoon bicarb soda


Method
1. Line each baking sheet with baking paper.  Preheat the oven to 180°C or 170°C for fan-forced ovens.  Sift the flour and bicarb soda into a large bowl.
2. Add the oats, coconut, sugar and salt.  Stir until combined.
3. In a saucepan over medium heat, combine the water, butter and golden syrup.  Stir until the butter has melted.  Add this to the dry ingredients and mix well.
4. Scoop the dough using a teaspoon and shape each one into a ball.
5. Place on the baking paper, 2.5 cm apart to allow for spreading.  Bake them for 10-12 minutes until they are golden brown.
6. Let them cool on the baking sheet for a couple of minutes until they harden up a little and transfer them to a cooling rack.  Allow to cool completely and place in an airtight container.

Makes about 50 little cookies.

Wednesday, September 7, 2011

Asian Bakery Style Milk Buns

Since making bread from scratch is such a lengthy process, I usually wait until the weekend before I undertake such a project.  Well, this weekend I made bread not once but twice which is a lot of arm work since I knead by hand.  And because we hardly ever make bread, the yeast in the fridge actually expired several months ago so I wasn't even sure if my bread would rise.

This method of bread making involves making a tangzhong which is a starter made from flour and water.  Adding this to the bread mix results in a loaf that is soft and fluffy like the ones found in Asian bakeries.

Photobucket

  The first batch I made I was a little over ambitious and I decided to make chocolate buns.  I really shouldn't tinker with recipes that I am trying out for the first time....Murphy's Law always holds true.  As well as adding cocoa powder, I didn't knead the butter into the dough properly and so my ball of dough wasn't really a ball and it was nice and glossy rather than being round, smooth and matte.  Also the oven was too hot hence the cracks.  

I had another crack at it the next day since I had some of the starter left.  This time I closely followed the recipe.  The result?  Buns so perfectly coloured, they look like they were airbrushed.  Next time I will be back to tinkering with the recipe.  ;)

Photobucket

Milk Buns
Adapted from Ivonne Chen, via like a strawberry milk

Makes 6 buns

For the tangzhong
50g  flour
250g water


For the dough
350g  flour
55g caster sugar
1tsp salt
one egg
125g milk
120g tangzhong
one tsp instant yeast
30g butter
, at room temperature 

For the wash
Milk or one egg, beaten

To make the tangzhong
  1. Whisk together the flour and  water until there are no lumps.  
  2. Cook this over a low to medium heat, whisking constantly until it reaches 65°C.  Place in a clean bowl and let it cool.

To make the dough
  1. Combine the flour, salt, yeast, sugar in a bowl.  In another bowl combine the tangzhong, milk and egg.  
  2. Add the dry ingredients to the wet ingredients.  Mix the liquid in until you get a sticky dough.  
  3. Turn the dough out onto a lightly floured surface and knead until it is smooth and elastic, about 10 minutes.  You will know when it is ready when you can stretch a piece of dough until it is very thin without it splitting.  
  4. Work the butter into the dough and knead until it is smooth.  
  5. Transfer to a lightly floured bowl and let it rise for 40 - 60 minutes or until doubled in size.
  6.  Scrape the dough out onto a lightly floured surface and punch to deflate.  Divide the dough into 6 piece and knead each piece into a ball.  
  7. Place onto a baking sheet lined with baking paper and let the dough rise for another 40 minutes.  While the dough is rising, preheat the oven to 180°C or 170°C for fan-forced ovens.  
  8. Brush the dough with the eggwash or milk.  
  9. Bake for 20 - 30 minutes until the bread is golden brown.  Transfer to a wire rack.

Tuesday, July 5, 2011

The Accidental Baker

I discovered this method of baking bread where you let the dough rise overnight in the fridge. It allows for the flavours to develop because the yeast grows at a slower pace...or something.

At 9pm last night I decided to try this recipe out. It was a bit wordy and I really wanted to sleep soon so I only glanced over the method, and subsequently mis-remembered a number of things. The original steps from A Bread a Day proceeds each of my "words of wisdom" in italics.

1.  In the bowl of a stand mixer, whisk together all but a handful of the flour and all the yeast.  Add the water and mix with the dough hook at low speed until a rough dough forms, about 1 minute....  
Mistake 1
I used all the plain flour I had for the dough mixture, no "handful"of flour set aside here.

Mistake 2
I decided to mix flour, water and SALT together, rather than yeast, then let it stand. Um, Mabel, what happened to letting the yeast multiply in this nice warm environment?

2.  Remove the plastic wrap, and add the salt....
Mistake 3
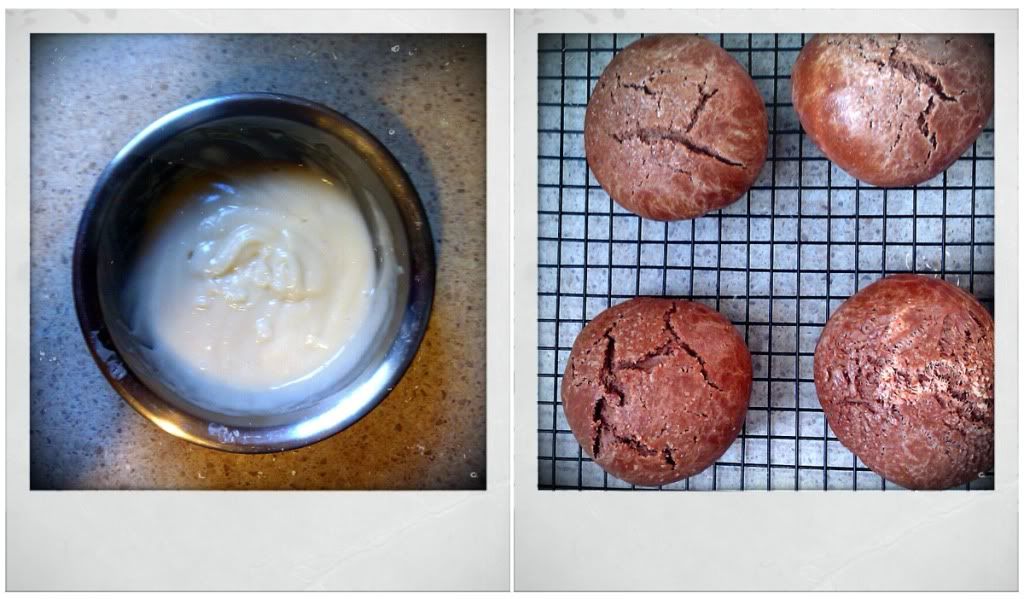
When I read this step, I realised my mistake. So what did I do? I sprinkled the yeast as evenly as I could on top of the dough and proceeded to incorporate it in. *Smack head in frustration*

3.  Turn the dough out onto a lightly floured surface, and knead a few times, forming the dough into a round ball with a skin stretching over the outside. Transfer to a lightly oiled bowl, smooth side up.  Cover with plastic wrap and refrigerate overnight, or for about 8 hours.
Mistake 4
Oh no! I forgot to reserve some flour for the kneading, and since I had run out of plain flour, I proceeded to use cornflour (gluten-free), another boo-boo. Nonetheless I started kneading and it began looking like a nice firm ball, but then 10 seconds later, it became a sticky flaccid mess. I searched for this "skin" that the recipe called for but to no avail. No matter how much cornflour I added to the dough, it reverted to its original stickiness. So I rolled the sticky gloopy dough into a clean bowl, covered, refrigerated, and hoped for the best.

4.  Let the dough stand at room temperature for 45 minutes to 1 hour before proceeding.  Line a large baking sheet with parchment paper.  Gently deflate the dough, and turn out onto a lightly floured surface.  Flatten the dough into a slight rectangle or oval shape.  Fold the two corners furthest away from you into the center of the dough, as though you were beginning to fold a paper airplane.  Starting with that point, roll the dough up into a cylinder, pressing gently to seal as you roll.  Press the final seam to seal.  Transfer the dough to the prepared baking sheet, seam-side down.  Tuck the ends under if desired, to make a more attractive loaf.  Cover loosely with lightly-oiled plastic wrap, and let rise until doubled in size, about 1 hour.  Thirty minutes before baking, preheat the oven to 425º F, and place another baking sheet or oven-safe pan in the bottom of the oven.  If you have a baking stone, heat it with the oven.  If not, your baking sheet is fine.
Mistake 5
I was hoping in the morning that the dough would magically come together overnight to form a ball, but no, it had just oozed to the sides. Something was growing though as there were air bubbles on the surface. When I peeled the sticky flaccid mess out of the bowl and onto the countertop for "deflating", the underside was pockmarked with lots of holes. The yeast was alive!

I tried to shape it the way described but I'm a visual person, and I got lost after shaping it into "paper airplanes" and "rolling into cylinders". So I squished all the air out, formed it into an asymmetrical log with an unintentional lip and dumped it into the loaf tin. Covered it with a towel and proceeded to make a bento box for this competition at Bento & Co instead. At this stage, I really couldn't care less. I had given up on my first attempt at bread.

5.  When fully risen, and using a sharp serrated knife or clean razor blade, make three decisive slashes in the top of the loaf at a 45º angle, evenly spaced.  Transfer the bread to the oven (or baking stone, if using).  Immediately throw 4 or 5 ice cubes into the hot pan on the oven floor.  Bake for 10 minutes, adding additional ice cubes as they melt.
Mistake 6 
Since I felt it was futile to do anything more with this lump, I didn't bother with the slashing or the throwing of ice cubes into the oven. I did cook tofu cubes while the bread was baking, perhaps that provided enough moisture in the air. I think the only thing I did follow in this recipe was the temperature.  I'm very good like that. Did I mention that I had to convert the ingredients down as I didn't have enough flour to begin with?

Baking is an exact science from what I have read but seriously before all of this rigorous scientific understanding of how gluten interacts with proteins interacts with enzymes etc etc, how did our ancestors do it?

The Verdict


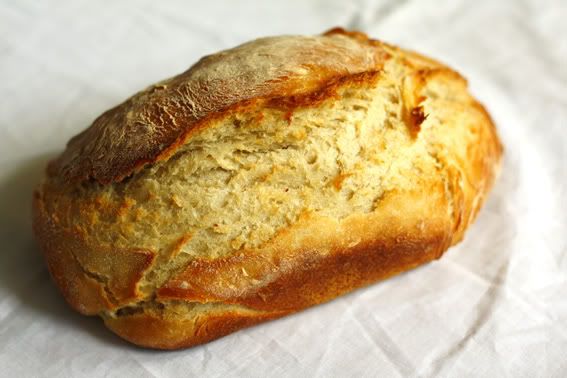
OMG times infinity! The loaf more than exceeded my expectations. The crust was crunchy and chewy at the same time. Tick.

The inside was soft and fluffy like supermarket bread. Tick.

I left it on the cooling rack and forgot to try it while hot, but even then it tasted fantastic. Two ticks.

I wonder how this bread would turn out if I actually followed the instructions? To be honest I don't think I could duplicate what I did. Perhaps it was the cold ambient temperature of the kitchen which helped. Perhaps it was my lack of kneading. Who knows! Have you tried this overnight fermentation method before and were you successful?

Monday, June 6, 2011

Apple Dumplings

I remember fondly eating apple turnovers while waiting for the train that took me to uni and after coming home from work. They tasted especially good since I couldn't wait the 10 minute walk to home and dinner. In my hurry to chow them down the icing sugar would inevitably get onto my clothes and I spent the rest of the walk trying to hide the evidence of the white powder. Where did this plentiful supply of gloppy apple and whipped cream with flaky pastry come from? The local Vietnamese bakery with their crazy cheap prices. Besides their turnovers, I loved their sausage rolls and pork rolls. But I didn't love the extra weight gained from eating there so had to stop visiting.


It's been many years since I sunk my teeth into an apple turnover so when I saw this recipe for apple dumplings I thought this was worth a try. I've tried this recipe twice now. The first time I cooked the apples in sugar and butter and forgot about it, until the juice had turned a bit like jam. The second time I doused it in cinnamon sugar. Both variations turned out fine. You can be as creative and fancy as you like with the apples. And why stop at apples, I think any in season fruit would work a treat: cherries, peaches, nectarines could all work.


This is a great recipe to involve the toddler in. We enjoyed turning the butter and flour mixture into crumbs. With the leftover scone-like dough, we turned them into Hello Kitty and cat and dog shaped biscuits. Success, with a capital S.


This recipe was quite easy to make if somewhat time consuming but trust me worth the effort. And surprisingly it tastes just as good if not better cold the next day.


What dessert could you eat over and over again?


Apple Dumplings (Adapted from Australian Women's Weekly)
Ingredients
For the dumplings
4 apples - medium sized apples. Big apples are harder to wrap up.
250g self-raising flour
90g butter plus 1 tablespoon
2 tablespoons sugar plus more for the apples
1/2 cup milk

For the syrup
100g sugar
60g butter
2 tablespoons lemon juice
1 cup water

Method
For the dumplings
1. Peel, core and quarter the apples. Heat up a frypan with butter, add the apples, sprinkle sugar on top, toss till the apples are coated in sugar, then cook till they are soft. You may need to add a little bit of water to help with the cooking process. Pop a lid on if you want to speed things along. No exact science here, I left the apples simmering on the stovetop until most of the liquid had evaporated and the apples were soft. You can make the dough while the apple cooks.
2. For the dough, sift flour into a bowl. Then rub in butter until the mixture resembles breadcrumbs. Don't give up, it eventually gets there. I must've stood there for at least 5 minutes thinking it ain't working, it ain't working when all of a sudden it started looking less like chunks of butter and flour and more like crumbs. Make sure your butter is soft and cut up into cubes to help with the process.
3. Once breadcrumb stage is reached, do a happy dance, then mix in the sugar. Add milk, mix to a soft dough. Roll out the dough onto a lightly-floured countertop until the dough is about 2-3 mm thick. You need a clear surface to work on. Trust me, makes rolling much more pleasant.
4. Cut the dough into 8cm squares, roughly big enough to wrap a piece of apple. And that is your next step.
5. Place a piece of apple in the middle of each square, fold the edges together like wrapping a little parcel. Then place them next to each other in one layer in a casserole dish. Pour syrup (instructions below) over the dumplings. Bake uncovered in a 180º oven for 30 to 35 minutes, till golden brown.   

For the syrup
5. Melt butter in a saucepan, add remaining ingredients and stir. Bring it to a boil, boil for three minutes or until it thickens a little. I found my syrup was still quite runny but once out of the oven it was all absorbed by the dumplings.

Serve with some whipped cream. Makes 12.

Saturday, April 16, 2011

Compare and Contrast

aww australian women's weekly recipe card apricot chicken
aww australian women's weekly vintage recipe card apricot chicken
Apricots, chicken, sour cream -  a dubious combination but apparently a popular one.  Apricot chicken is still a popular dish today, you can even buy the sauce ready made, like from this well-known brand.  That jingle is permanently burnt into my brain.  Thank you commercial TV.

aww australian women's weekly recipe card apricot chicken
This dish is very straight forward to make, half the stuff comes in a can or a tub, not tinned sausages or anything like that.  I mean stuff like apricot nectar and sour cream.  Roadtesting the AWW recipes has been a pleasant surprise, time and time again.  Albeit we have been quite conservative with our choices but c'mon do you want to eat tripe in a cream sauce? *shudder*  What I am trying to say is is that the recipe haven't really been that a(w)wful. 
aww australian women's weekly recipe cards apricot chicken
Posh Nosh never fails to amuse me immensely.  If you haven't seen it yet, I strongly recommend you check it out.


Apricot Chicken (adapted from Australian Women's Weekly)
500g chicken thigh pieces
1 medium onion, finely sliced
30g butter
1/2 tablespoon cornflour
half a can of apricot nectar (405mL size)
salt, pepper
60g dried apricots, chopped in half
1 green capsicum, thinly sliced
1/4 cup sour cream

1. Melt the butter in a saucepan and brown the chicken pieces.  Remove the chicken and add the onion to the saucepan.  Saute until it becomes transparent.
aww australian women's weekly recipe cards apricot chicken process
2. Whisk the cornflour into the apricot nectar.  Add to the pan and stir until the mixture boils.
    3. Reduce the heat and add the dried apricots, chicken pieces and simmer until the chicken is nearly cooked, stirring occasionally.aww australian women's weekly recipe card process
    4. Add the capsicum and simmer for another 5-6 minutes or until the capsicum is soft.  Stir in the sour cream, stir until the mixture is hot. 
      aww australian women's weekly vintage recipe cards apricot chicken
      Related Posts Plugin for WordPress, Blogger...